
Ok, so I've checked my valve clearances and the exhaust valves are all too tight. To adjust this it's not as simple as with OHV engines and you have to remove the cams. To accomplish THIS:
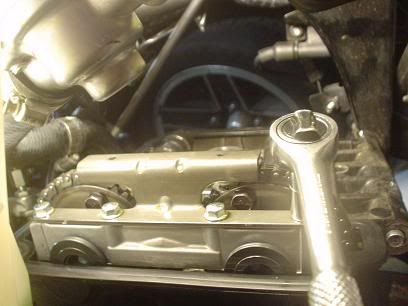
Step 1 - Remove the CCT
![Image]()
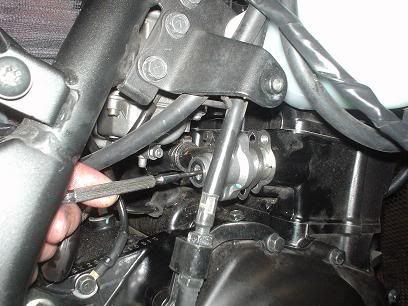
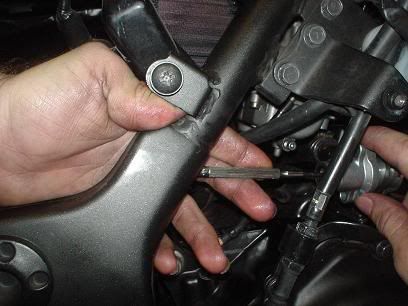
Remove the 10mm center bolt in the Camshaft Chain Tensioner. Then remove the (2) outer 8mm bolts. The CCT should pull out easily.
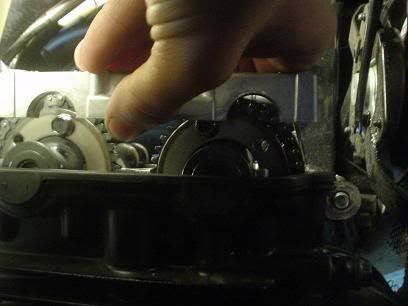
Step 2 - Time the engine
![Image]()
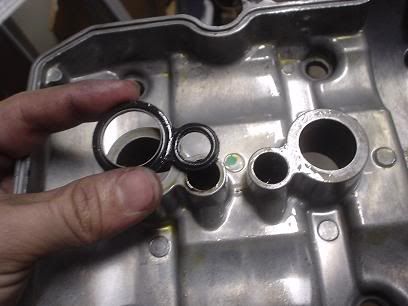
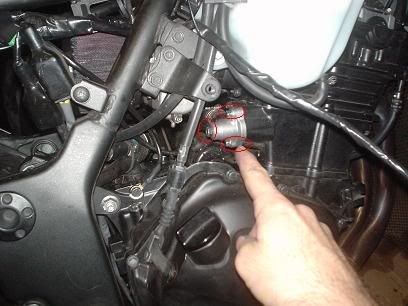
Turn the engine over (again use a 14mm socket and turn clock-wise). You're going to look in the alternator cover inspection hole (the little hole about 6 inches above THIS hole) until you see "2|T" in the middle.
![Image]()
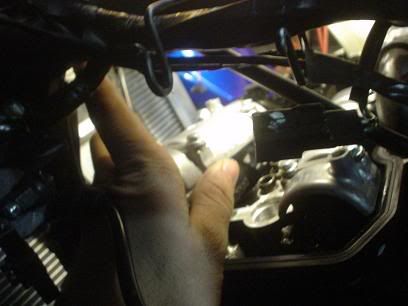
I couldn't for the life of me get a good picture of this. Either there was too much light and it would create a glare, or like this not enough light to see the markings. Oh well.
![Image]()
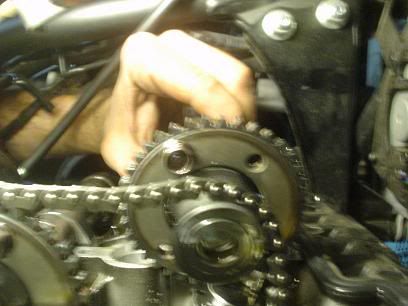
With any 4-stroke engine you'll hit "2|T" TWICE per complete engine cycle. I made sure that I had the engine on "2|T" (which is cylinder #2 at TDC) at the end of i's compression stroke. The camshafts should line up as you can see in the picture above. Notice the two white dots face eachother? Timed!
Step 3 - Loosen camshaft cap bolts.
![Image]()
These little 8mm bastards are pretty tight, but still exercise care when removing them. I always suggest when removing and installing camshaft caps to use a 'crossing' pattern instead of simply removing one cap at a time.
Step 4 - Loosen camshaft top-chain guide/caps
![Image]()
![Image]()
Then you can remove the camshaft caps:
![Image]()
WATCH OUT here:
![Image]()
Notice the (4) outter and (2) inner dowel pins? They're not pressed in, but they are 'floating'. Meaning you need to be careful when pulling the camshaft caps that these don't come out (and then fall into the engine). They're there to keep the camshaft caps (and the two center ones for aligning the valve cover). They WILL pull up especially if you don't lift the camshaft caps up evenly.
Anywho...
Step 5 - Remove camshafts
![Image]()
Oh joy of joys! If you push on the chain a little it should push the camshaft tensioner outward and put some slack into the chain. Lift the chain away from one sprocket at a time and remove the camshaft. Afterwards drape the chain over the side of the head so you don't have to fish it out of the engine later .
.
Step 6 - Remove tappets
![Image]()
They'll wiggle out (some of them might need some needle nose plier assistance). You can see I've removed one of the exhaust valve tappets here. I've popped the shim loose and you can see it laying inside the cover. They'll all stick to the tappet which is handy as you don't have to worry much about them falling into the engine while you remove them.
Important - Put them caps in ORDER
![Image]()
I've just tossed them all on a piece of carboard in order. This comes in handy as I can write the shim thicknesses directly above each tappet.
Step 7 - Measure the shims.
![Image]()
Most people have dial calipers which work fine or...
![Image]()
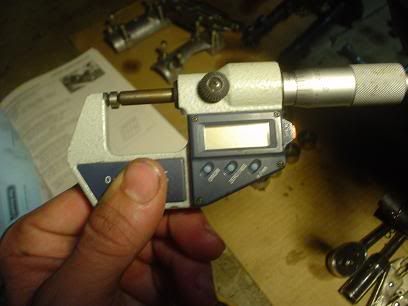
I prefer micrometers though as they often have higher degrees of accuracy.
Now... DON'T get confused with the conversions. I measured the lash with SAE standard feeler gauges. I then measured the shims ALSO in inches. You can convert in the last step (The less conversion you do the less the room for error). While each shim should have a number on each side of it which translates to a thickness on a chart these numbers are hard to read. That's why it's still wise to physically measure them. When you have the new shims though you can rely on the printed numbers on the shims...
Step 1 - Remove the CCT
Remove the 10mm center bolt in the Camshaft Chain Tensioner. Then remove the (2) outer 8mm bolts. The CCT should pull out easily.
Step 2 - Time the engine
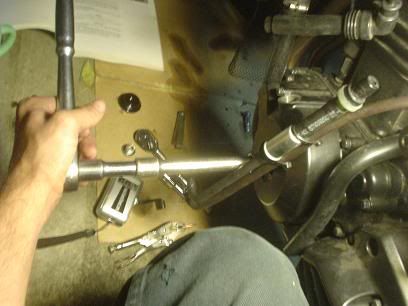
Turn the engine over (again use a 14mm socket and turn clock-wise). You're going to look in the alternator cover inspection hole (the little hole about 6 inches above THIS hole) until you see "2|T" in the middle.
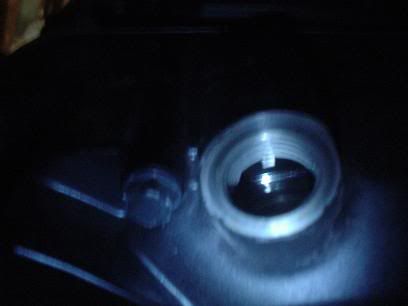
I couldn't for the life of me get a good picture of this. Either there was too much light and it would create a glare, or like this not enough light to see the markings. Oh well.
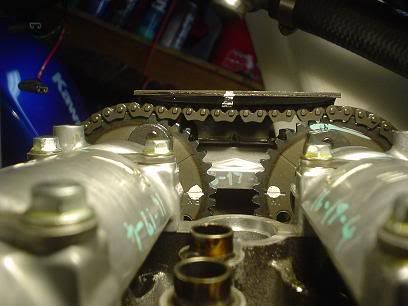
With any 4-stroke engine you'll hit "2|T" TWICE per complete engine cycle. I made sure that I had the engine on "2|T" (which is cylinder #2 at TDC) at the end of i's compression stroke. The camshafts should line up as you can see in the picture above. Notice the two white dots face eachother? Timed!
Step 3 - Loosen camshaft cap bolts.
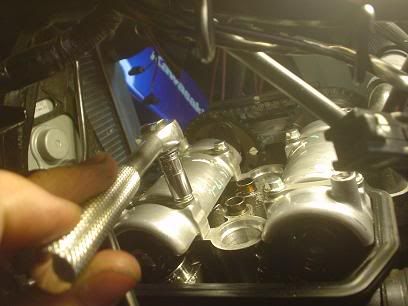
These little 8mm bastards are pretty tight, but still exercise care when removing them. I always suggest when removing and installing camshaft caps to use a 'crossing' pattern instead of simply removing one cap at a time.
Step 4 - Loosen camshaft top-chain guide/caps
Then you can remove the camshaft caps:
WATCH OUT here:
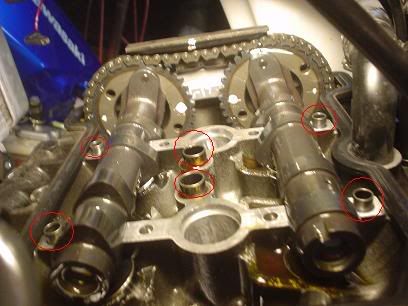
Notice the (4) outter and (2) inner dowel pins? They're not pressed in, but they are 'floating'. Meaning you need to be careful when pulling the camshaft caps that these don't come out (and then fall into the engine). They're there to keep the camshaft caps (and the two center ones for aligning the valve cover). They WILL pull up especially if you don't lift the camshaft caps up evenly.
Anywho...
Step 5 - Remove camshafts
Oh joy of joys! If you push on the chain a little it should push the camshaft tensioner outward and put some slack into the chain. Lift the chain away from one sprocket at a time and remove the camshaft. Afterwards drape the chain over the side of the head so you don't have to fish it out of the engine later
.Step 6 - Remove tappets
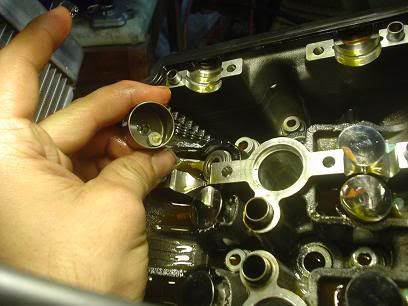
They'll wiggle out (some of them might need some needle nose plier assistance). You can see I've removed one of the exhaust valve tappets here. I've popped the shim loose and you can see it laying inside the cover. They'll all stick to the tappet which is handy as you don't have to worry much about them falling into the engine while you remove them.
Important - Put them caps in ORDER
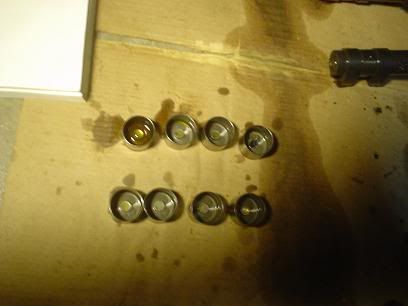
I've just tossed them all on a piece of carboard in order. This comes in handy as I can write the shim thicknesses directly above each tappet.
Step 7 - Measure the shims.
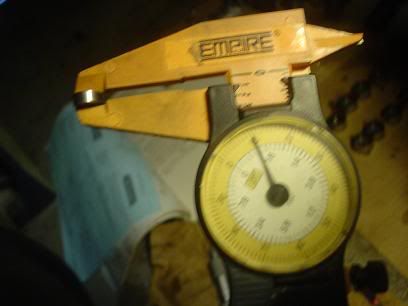
Most people have dial calipers which work fine or...
I prefer micrometers though as they often have higher degrees of accuracy.
Now... DON'T get confused with the conversions. I measured the lash with SAE standard feeler gauges. I then measured the shims ALSO in inches. You can convert in the last step (The less conversion you do the less the room for error). While each shim should have a number on each side of it which translates to a thickness on a chart these numbers are hard to read. That's why it's still wise to physically measure them. When you have the new shims though you can rely on the printed numbers on the shims...