

Hey guys and gals, I thought I'd do a how-to on taking apart/dismantling inverted forks. What I have here are stock forks off of an 07/08 ZX6R, but they are all constructed very similarly. If you can take them apart, then you can put them back together (hopefully). If you need certain specs like spring length and whatnot, be sure to check your service manual for those. Ok, on with the how-to. Please read the whole thing before getting started. There are different steps that need to be followed for oil-only change or oil and fork seal change. Fork oil only does not require the internals to come out of the fork. Full disassembly to remove the bad seals requires the bottom allen bolt to be removed (look up at the fork while on the bike and you'll see it---typically a 10 mm allen/hex key).
With the forks still on the bike and wheel removed there are a few things to do first.
1) Loosen the preload adjuster (counter-clockwise)
2) Loosen the rebound adjuster --OR--
3) Tighten the rebound adjuster (full clockwise)
4) Loosen the fork cap about one turn (you'll unscrew it the rest of the way after the fork is removed--triple tree helps hold the fork steady while you pop that cap loose).
If you go with method (2), then you need to make sure the nut on the damping rod holder goes back where you found it. This is the nut that the cap screws down against. If your cap is either too far down or too high on that damping rod holder it will screw up your suspension settings, namely the rebound damping. Before you remove the cap after the spring is compressed you can measure or eyeball where the nut is, then make sure it is there when you put it back together. Your service manual will also tell you how far down that nut is as measured from the top of the damping rod holder.
If you go with option (3), screw the damping adjuster full clockwise until it stops (don't crank down on this!). Now when you screw the cap back down on top of the damping rod holder the cap will stop when the damping rod hits bottom. In this case you will turn the nut on the damping rod holder until it contacts the bottom of the cap, then simply tighten it against the cap. There, no damping issues to follow. This is a good method to use after a fork rebuild or fluid change to better ensure both forks are set up the same. I'm sure method (2), per the manual, works fine, but if you go with method (3) you don't have to worry about forgetting where that damn nut was set before loosening it. I know I get engrossed in stuff at times and forget where something was before I started.
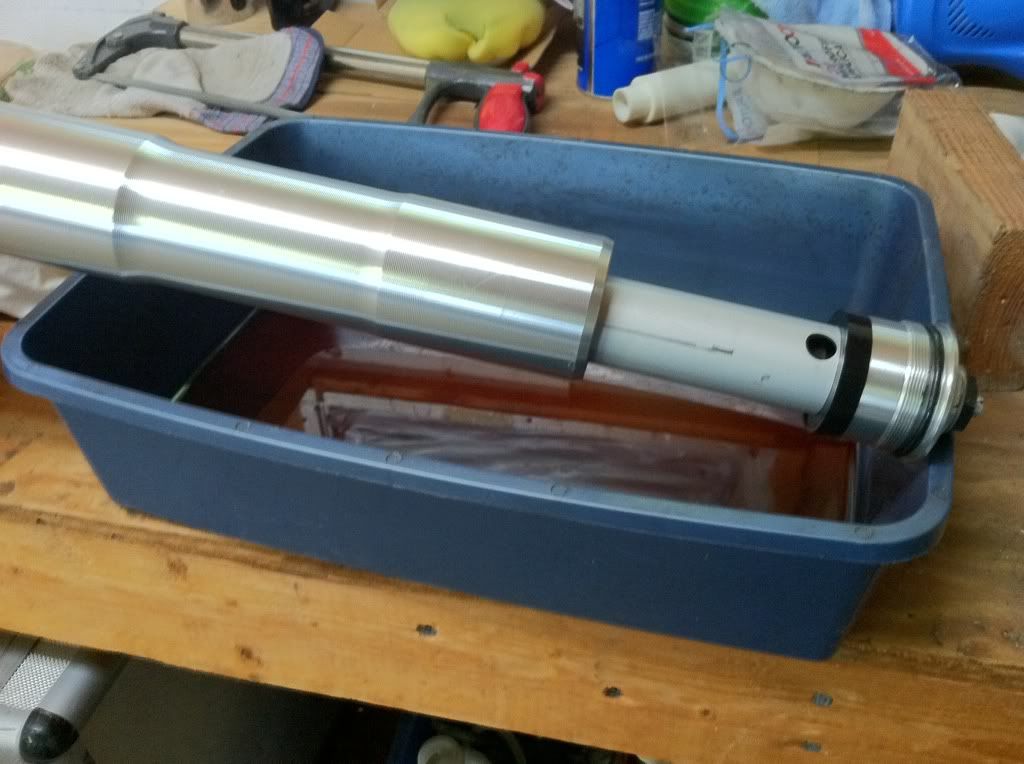
I did mine with a vice because these forks were intended to go on the bike, but I discovered they were bent, so I dug deeper to see how bad they were.
![Image]()
Don't forget the compression damping adjuster at the bottom of the fork (optional for oil change only).
![Image]()
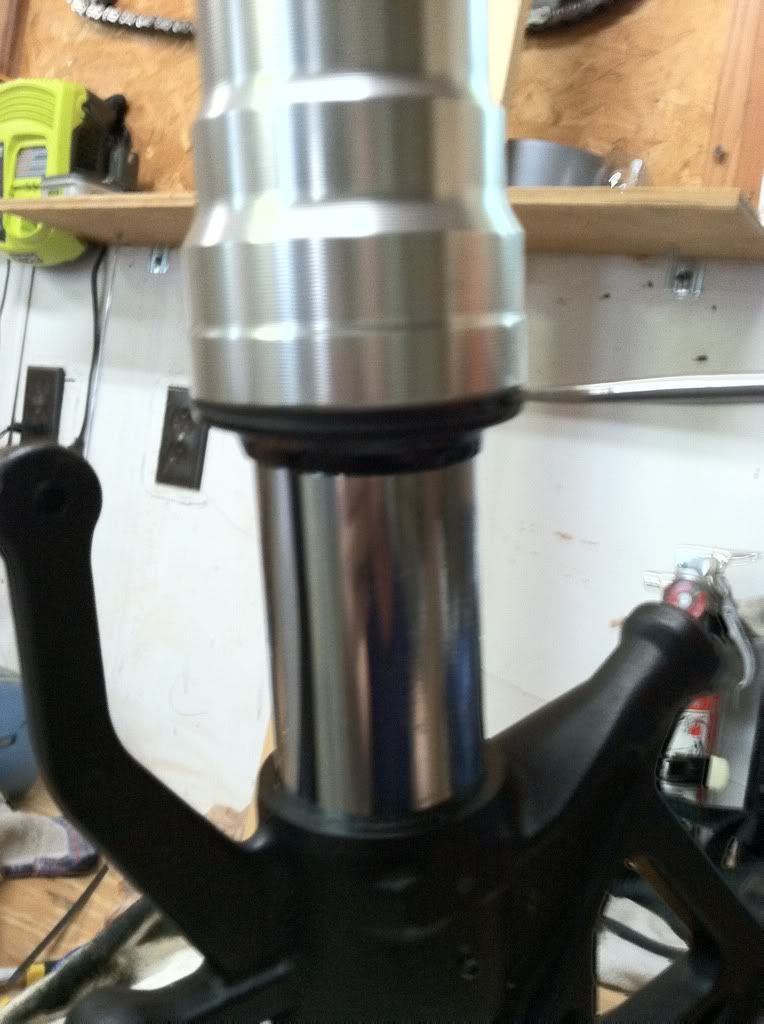
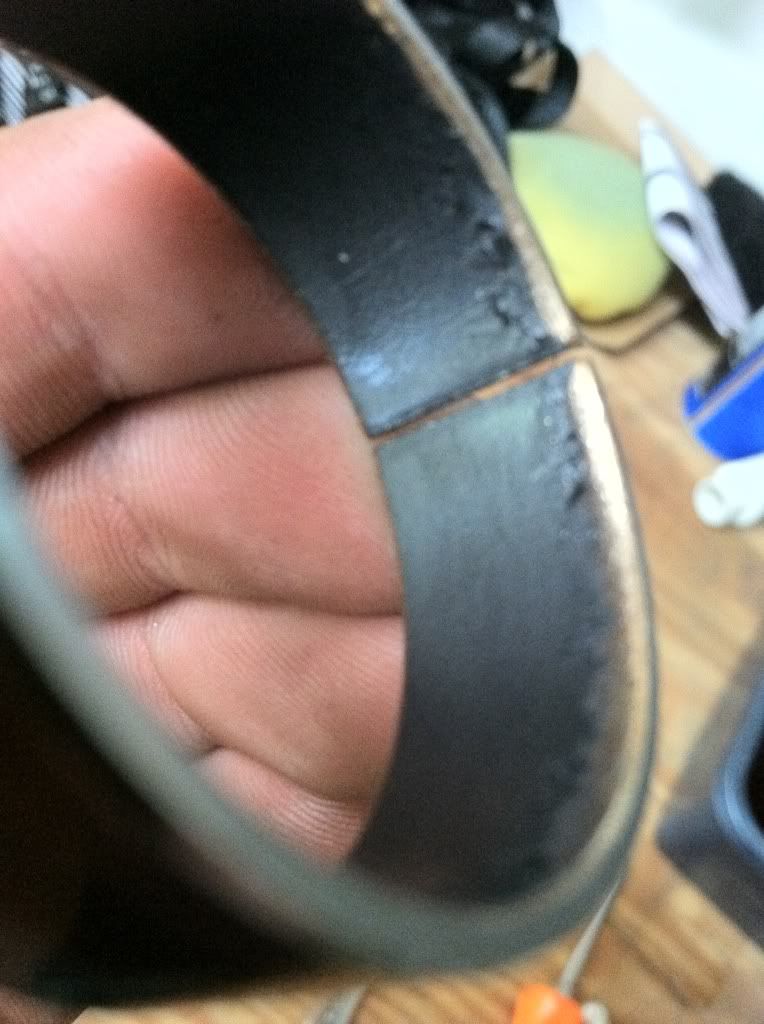
With an appropriately sized socket, unscrew the cap. Be sure to use good counter torque as to not slip and round off your cap. Not only is it ugly, but it's out in the open and you will hate yourself every time you look down. :lol:
![Image]()
This is what you'll see after the cap is loosened and the outer fork leg is pressed all the way down.
![Image]()
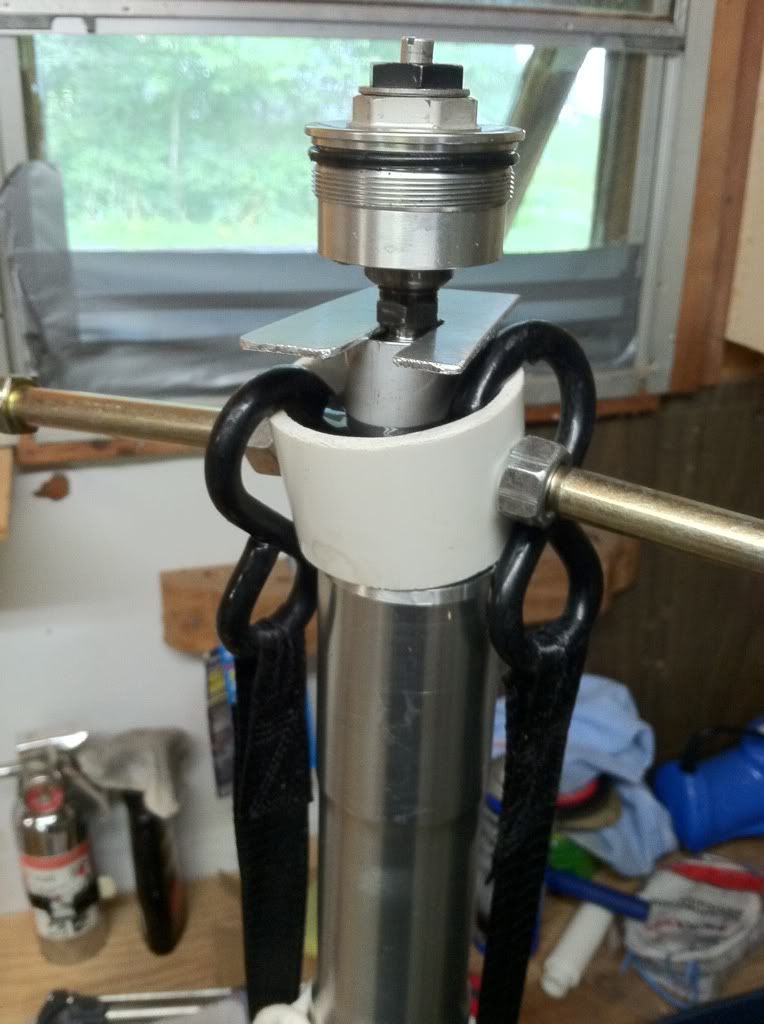
With some spare parts sitting around along with a ratchet strap, I made a fork spring compressor (saved myself $120). Connect the fork spring compressor tool to the spring spacer (see the holes?) and compress the spring to reveal two nuts butted up against each other, and insert your fork rod holder thingy under the nut to hold it in place. (the fork is being held in place by my bench vice, ratchet strap running through the caliper mount).
![Image]()
![Image]()
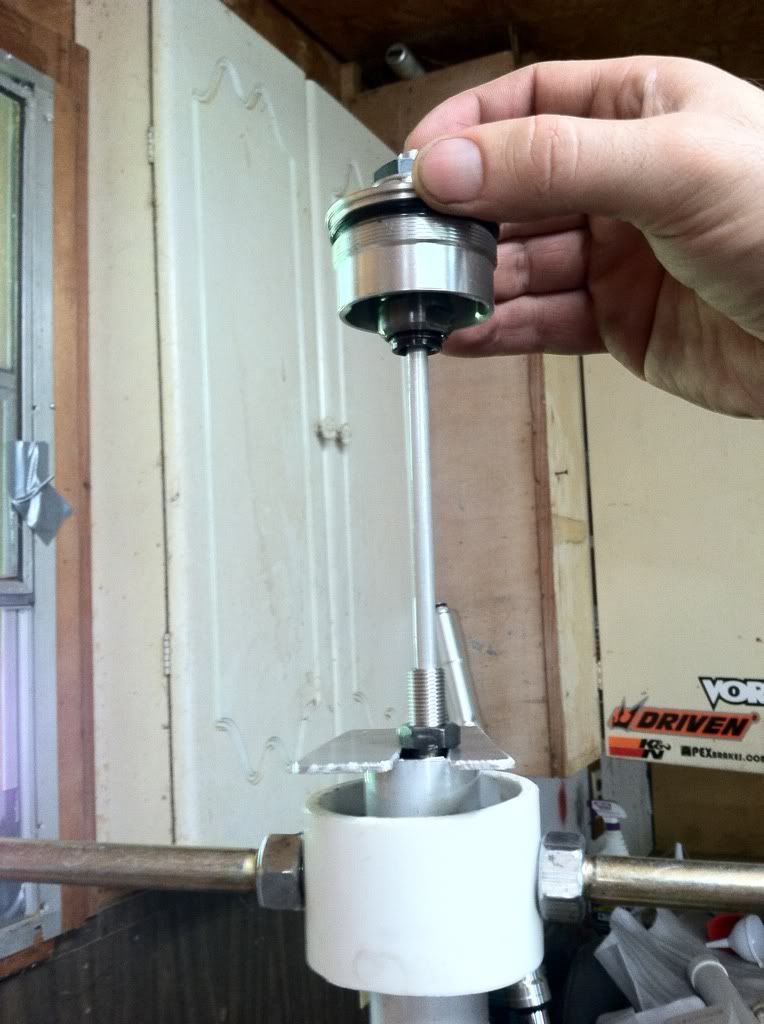
With two wrenches, loosen the cap from the damping rod, remove it, and set it aside on a clean surface.
![Image]()
![Image]()
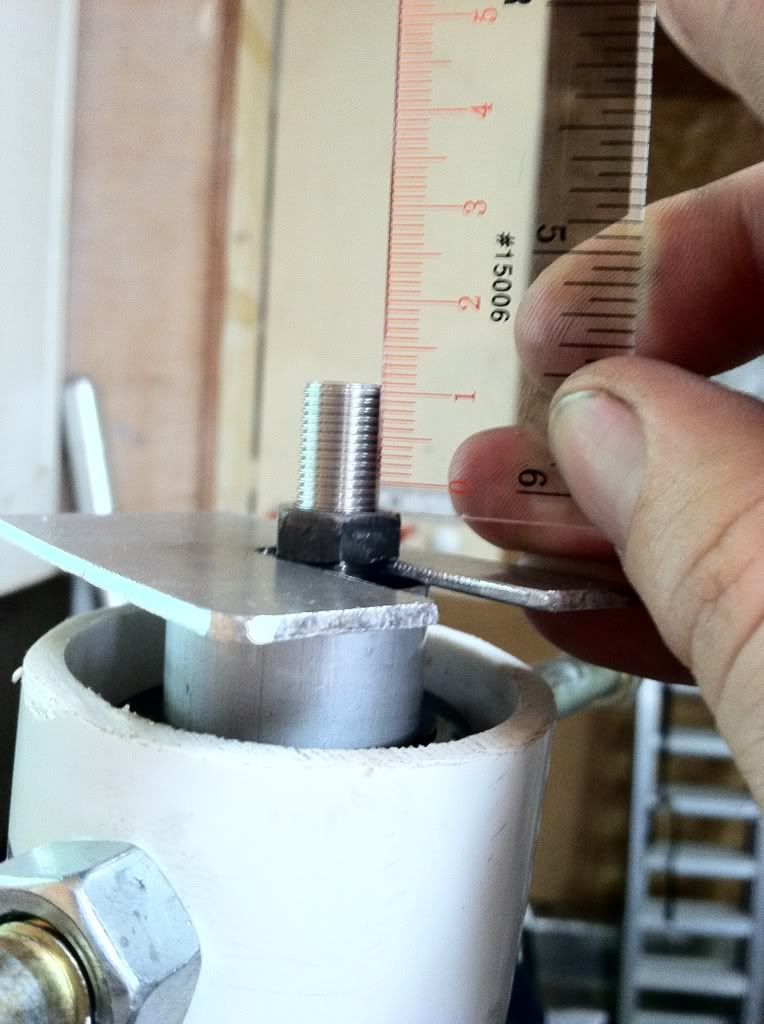
Measure the height here so that you can put that nut back in the same spot. I spoke earlier with the other method to ensure this stays correct (damping adjuster fully clockwise).
![Image]()
Now drain the fork into an appropriate container as best as you can. Pump the damping rod holder and outer tube while inverted and draining.
![Image]()
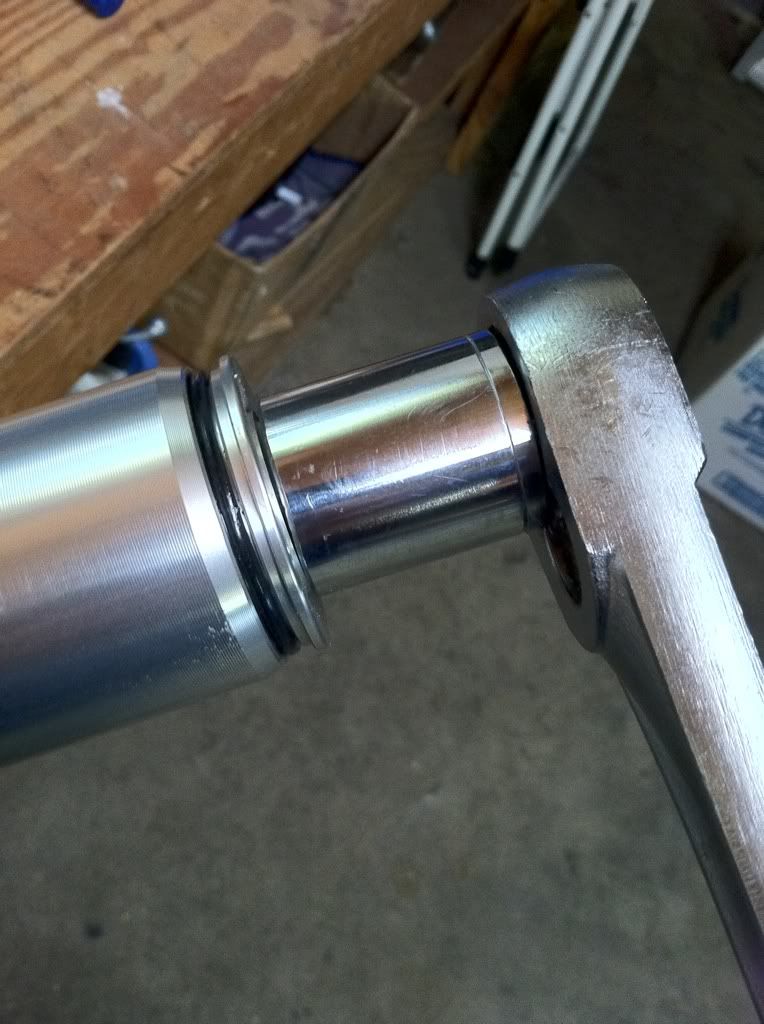
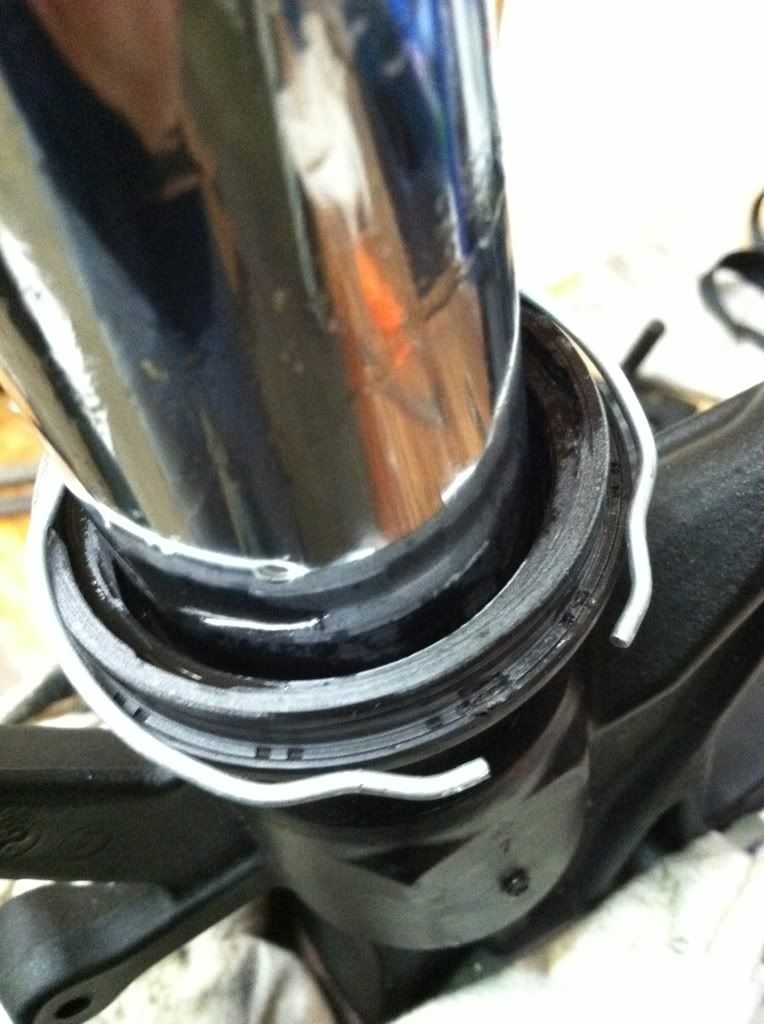
Remove the dust seal and oil seal retaining spring.
![Image]()
![Image]()
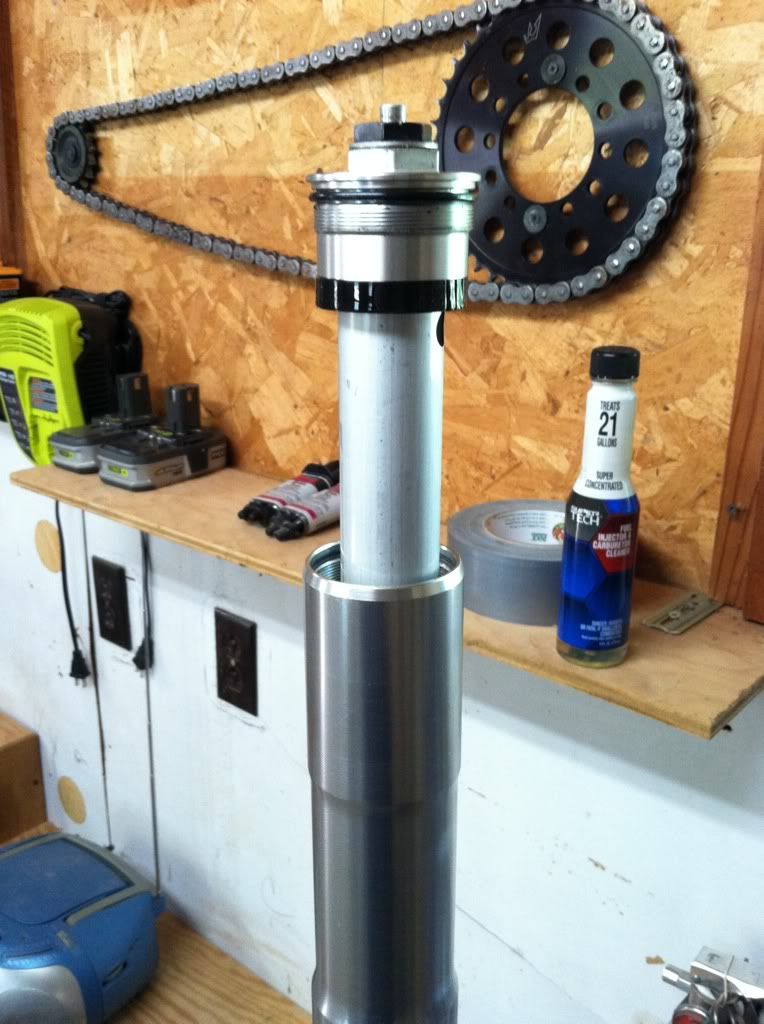
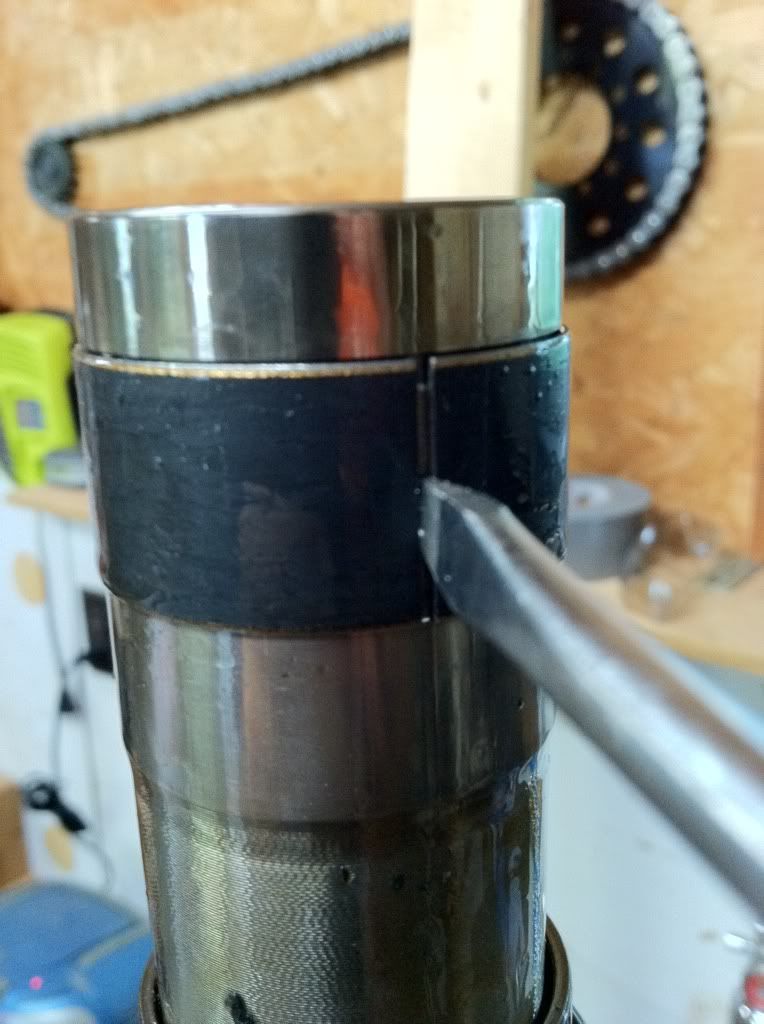
Using a slide hammer motion, grasp the inner and outer tubes and pull them apart. It'll take a few good smacks.
With a thin flat head screwdriver, you can remove the two bushings. Make sure you inspect the bushings for damage. If they're damaged, replace them. These have a teflon coating on them. If it's severly damaged, replace it. Damage can also be seen if you have silver discoloration in your fork oil after it's drained in the pan.
![Image]()
Here's the lower bushing, as you can see it's damaged, which is likely due to the previous owner wrecking the bike and damaging the forks.
![Image]()
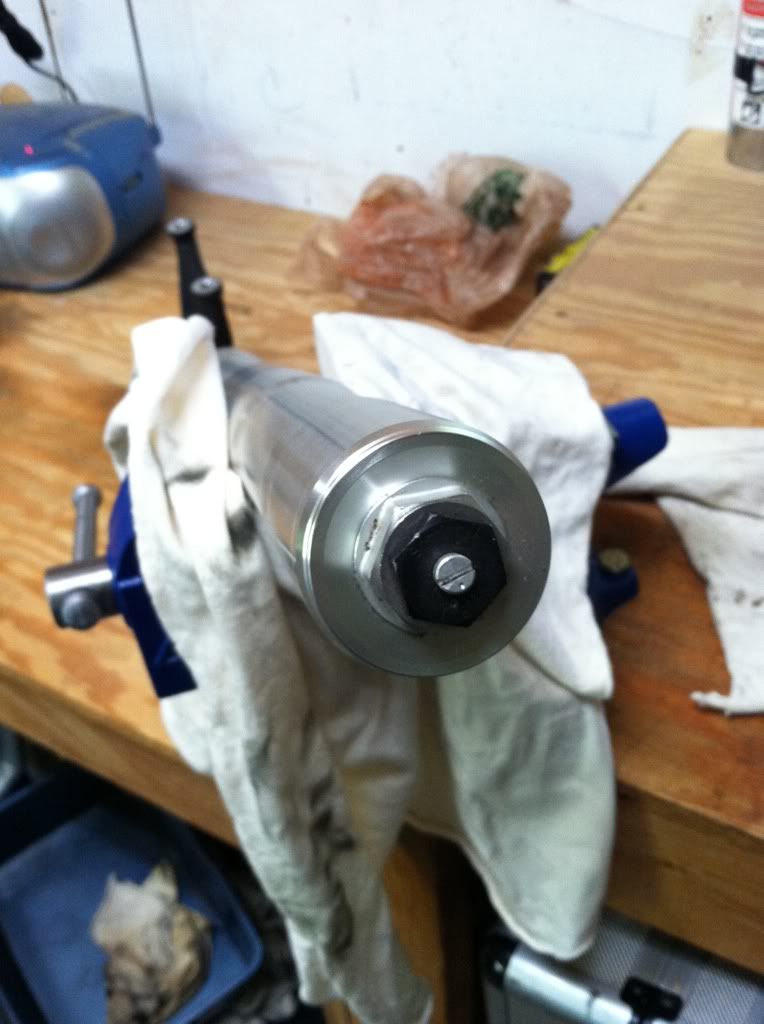
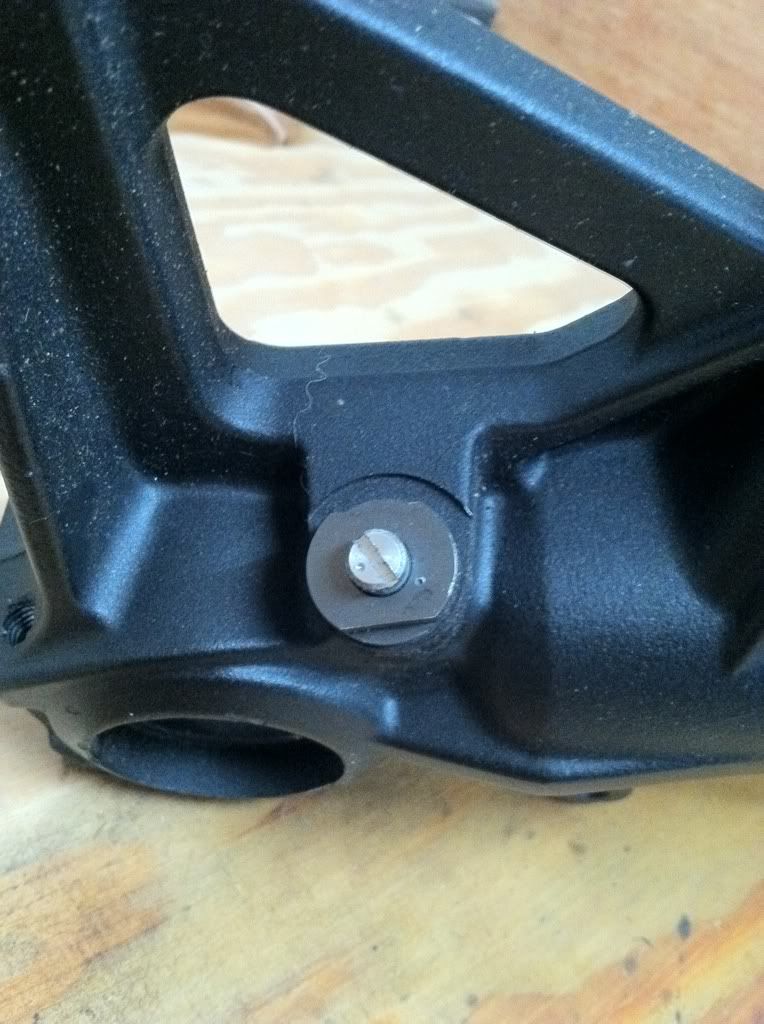
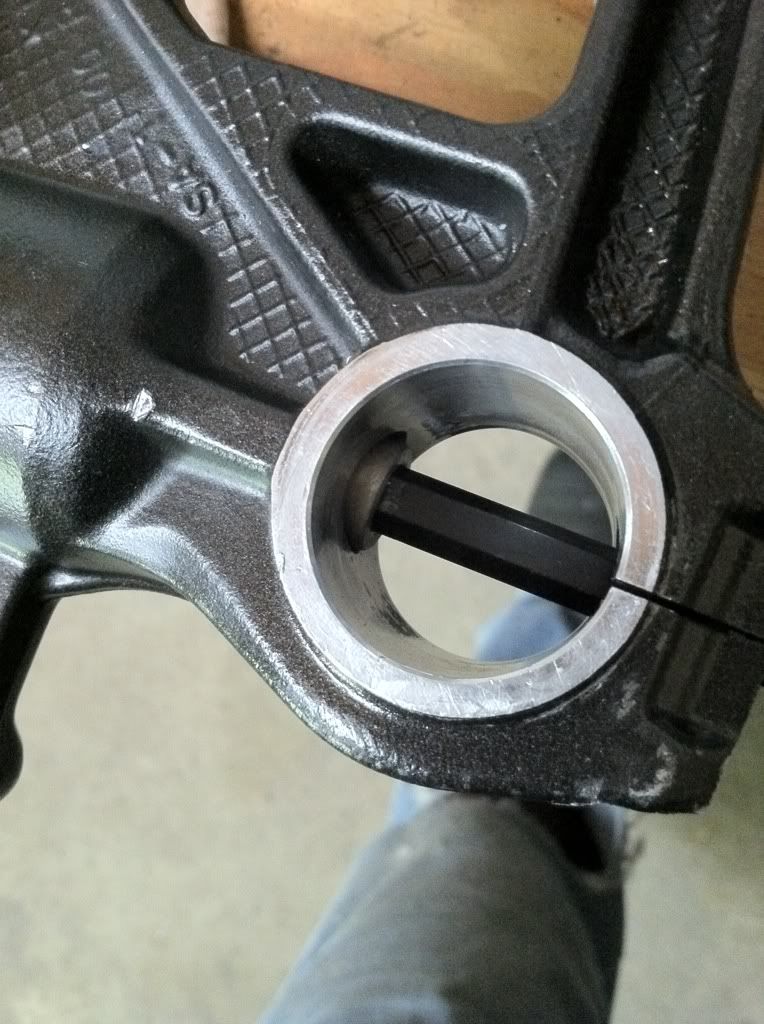
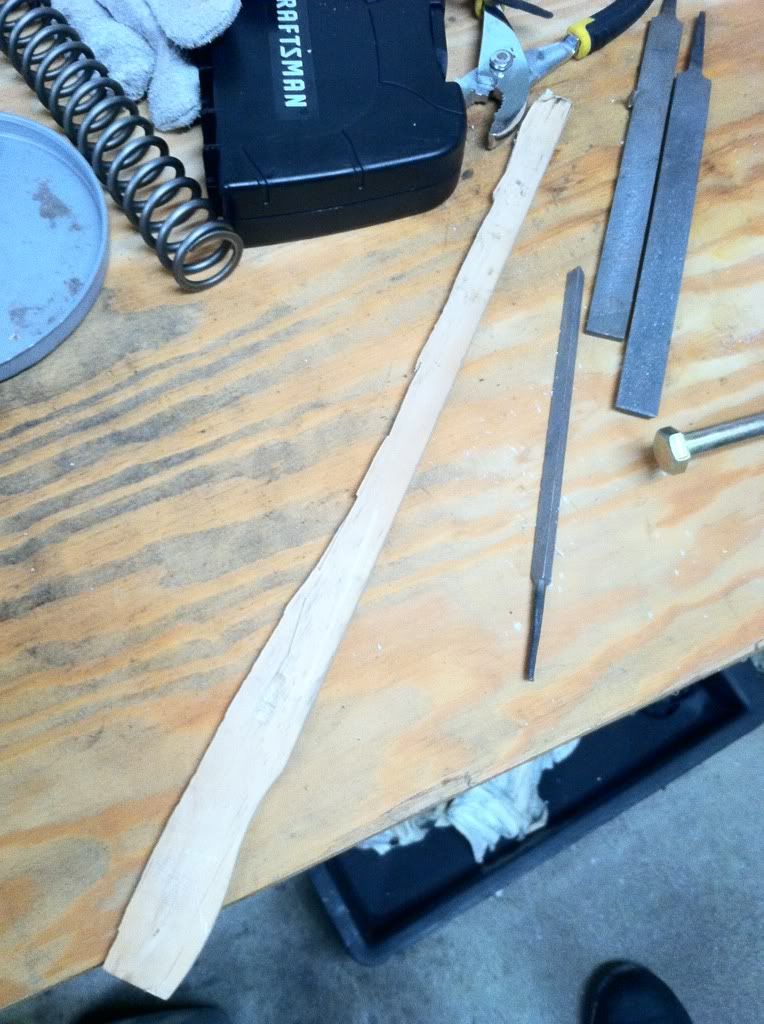
Put an allen key or socket into the bottom of the fork and remove the bolt. More often than not, the bolt wants to loosend up, but then not come all the way out and leave the internals assembly spinning. What I did was insert a small piece of wood into the fork leg to wedge between the assembly and fork tube to give it enough resistance to get that stupid bolt out. If you have an impact driver, then you can do this without the ghetto stick. It's even easier if you zap this bolt out with an impact or allen wrench (better yet a hex bit on a socket/impact) while the forks are still on the bike; the fork spring pressure helps keep the internals from turning.
![Image]()
![Image]()
Paint stir stick as my wedge.
![Image]()
With that nut out, the internals will come right out and you're done. Now you can take a stick and rag and thoroughly clean the tubes and check for straightness (on a known flat surface or run-out gauge). A simple wooden dowel from an arts and crafts store works beautifully. Cram a rag in the fork tube, then use the down to move it around and push it back out. Dump a small amount of clean oil in the tube to help remove any more residue present.
I hope this helps someone out. Take care. :thumbup:
With the forks still on the bike and wheel removed there are a few things to do first.
1) Loosen the preload adjuster (counter-clockwise)
2) Loosen the rebound adjuster --OR--
3) Tighten the rebound adjuster (full clockwise)
4) Loosen the fork cap about one turn (you'll unscrew it the rest of the way after the fork is removed--triple tree helps hold the fork steady while you pop that cap loose).
If you go with method (2), then you need to make sure the nut on the damping rod holder goes back where you found it. This is the nut that the cap screws down against. If your cap is either too far down or too high on that damping rod holder it will screw up your suspension settings, namely the rebound damping. Before you remove the cap after the spring is compressed you can measure or eyeball where the nut is, then make sure it is there when you put it back together. Your service manual will also tell you how far down that nut is as measured from the top of the damping rod holder.
If you go with option (3), screw the damping adjuster full clockwise until it stops (don't crank down on this!). Now when you screw the cap back down on top of the damping rod holder the cap will stop when the damping rod hits bottom. In this case you will turn the nut on the damping rod holder until it contacts the bottom of the cap, then simply tighten it against the cap. There, no damping issues to follow. This is a good method to use after a fork rebuild or fluid change to better ensure both forks are set up the same. I'm sure method (2), per the manual, works fine, but if you go with method (3) you don't have to worry about forgetting where that damn nut was set before loosening it. I know I get engrossed in stuff at times and forget where something was before I started.
I did mine with a vice because these forks were intended to go on the bike, but I discovered they were bent, so I dug deeper to see how bad they were.
Don't forget the compression damping adjuster at the bottom of the fork (optional for oil change only).
With an appropriately sized socket, unscrew the cap. Be sure to use good counter torque as to not slip and round off your cap. Not only is it ugly, but it's out in the open and you will hate yourself every time you look down. :lol:
This is what you'll see after the cap is loosened and the outer fork leg is pressed all the way down.
With some spare parts sitting around along with a ratchet strap, I made a fork spring compressor (saved myself $120). Connect the fork spring compressor tool to the spring spacer (see the holes?) and compress the spring to reveal two nuts butted up against each other, and insert your fork rod holder thingy under the nut to hold it in place. (the fork is being held in place by my bench vice, ratchet strap running through the caliper mount).
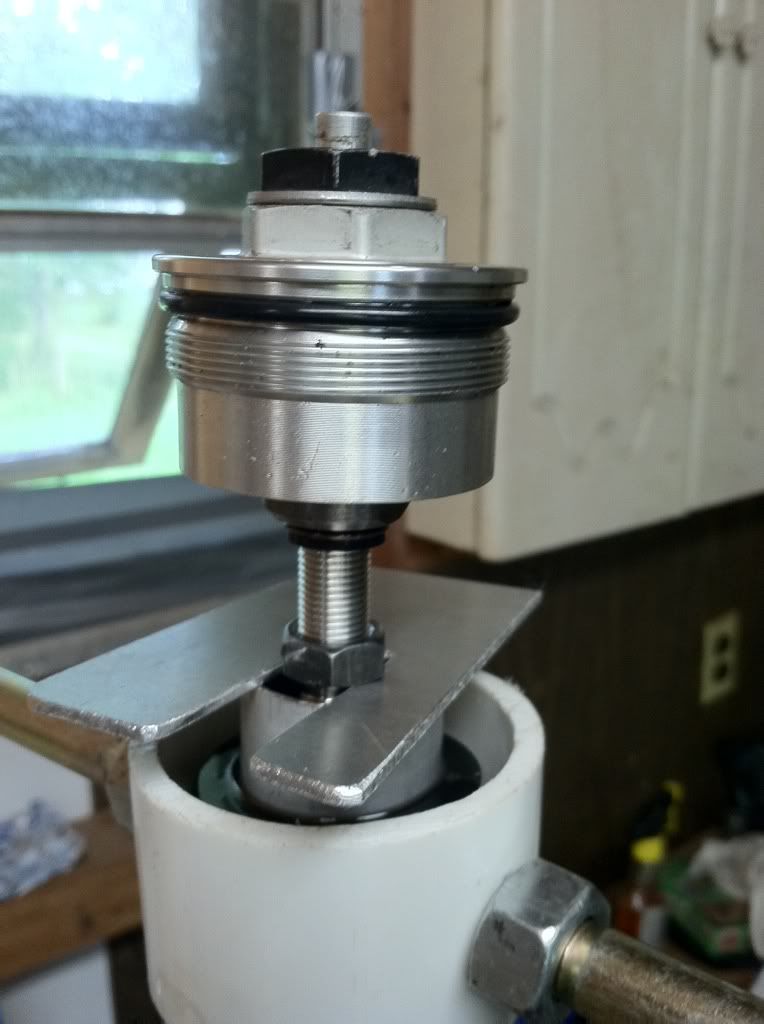
With two wrenches, loosen the cap from the damping rod, remove it, and set it aside on a clean surface.

Measure the height here so that you can put that nut back in the same spot. I spoke earlier with the other method to ensure this stays correct (damping adjuster fully clockwise).
Now drain the fork into an appropriate container as best as you can. Pump the damping rod holder and outer tube while inverted and draining.
Remove the dust seal and oil seal retaining spring.
Using a slide hammer motion, grasp the inner and outer tubes and pull them apart. It'll take a few good smacks.
With a thin flat head screwdriver, you can remove the two bushings. Make sure you inspect the bushings for damage. If they're damaged, replace them. These have a teflon coating on them. If it's severly damaged, replace it. Damage can also be seen if you have silver discoloration in your fork oil after it's drained in the pan.
Here's the lower bushing, as you can see it's damaged, which is likely due to the previous owner wrecking the bike and damaging the forks.
Put an allen key or socket into the bottom of the fork and remove the bolt. More often than not, the bolt wants to loosend up, but then not come all the way out and leave the internals assembly spinning. What I did was insert a small piece of wood into the fork leg to wedge between the assembly and fork tube to give it enough resistance to get that stupid bolt out. If you have an impact driver, then you can do this without the ghetto stick. It's even easier if you zap this bolt out with an impact or allen wrench (better yet a hex bit on a socket/impact) while the forks are still on the bike; the fork spring pressure helps keep the internals from turning.
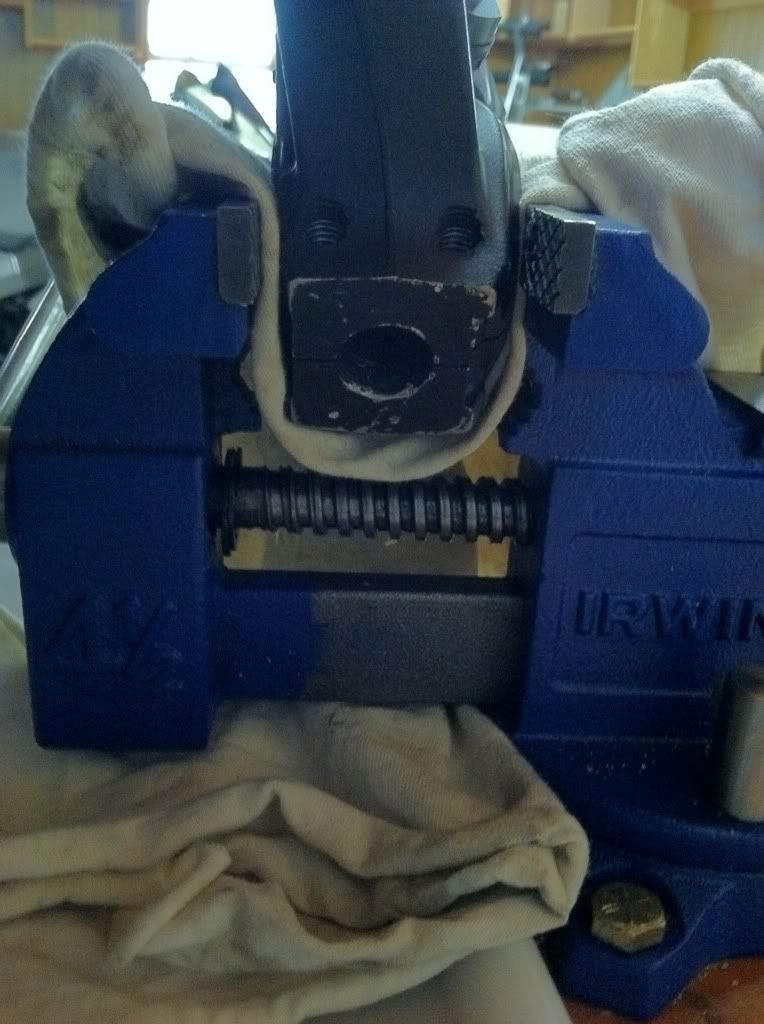
Paint stir stick as my wedge.
With that nut out, the internals will come right out and you're done. Now you can take a stick and rag and thoroughly clean the tubes and check for straightness (on a known flat surface or run-out gauge). A simple wooden dowel from an arts and crafts store works beautifully. Cram a rag in the fork tube, then use the down to move it around and push it back out. Dump a small amount of clean oil in the tube to help remove any more residue present.
I hope this helps someone out. Take care. :thumbup:


